
An XML sitemap is one of the simplest ways to help search engines understand and index your website. If you want better visibility in Google and faster indexing of your pages, creating a sitemap is a must.
In this guide, you’ll learn exactly how to create an XML sitemap, submit it, and keep it optimized—without any technical confusion.
What Is an XML Sitemap?
An XML sitemap is a file that lists all the important pages on your website. It tells search engines:
- Which pages exist
- How often they’re updated
- Which pages are most important
Think of it as a roadmap that helps search engines crawl your site more efficiently.
Why an XML Sitemap Matters for SEO
While search engines can find pages on their own, a sitemap gives you more control and improves your chances of indexing.
Key benefits:
- Faster indexing of new pages
- Better visibility for large or new websites
- Helps find orphan pages (pages with no internal links)
- Improves crawl efficiency
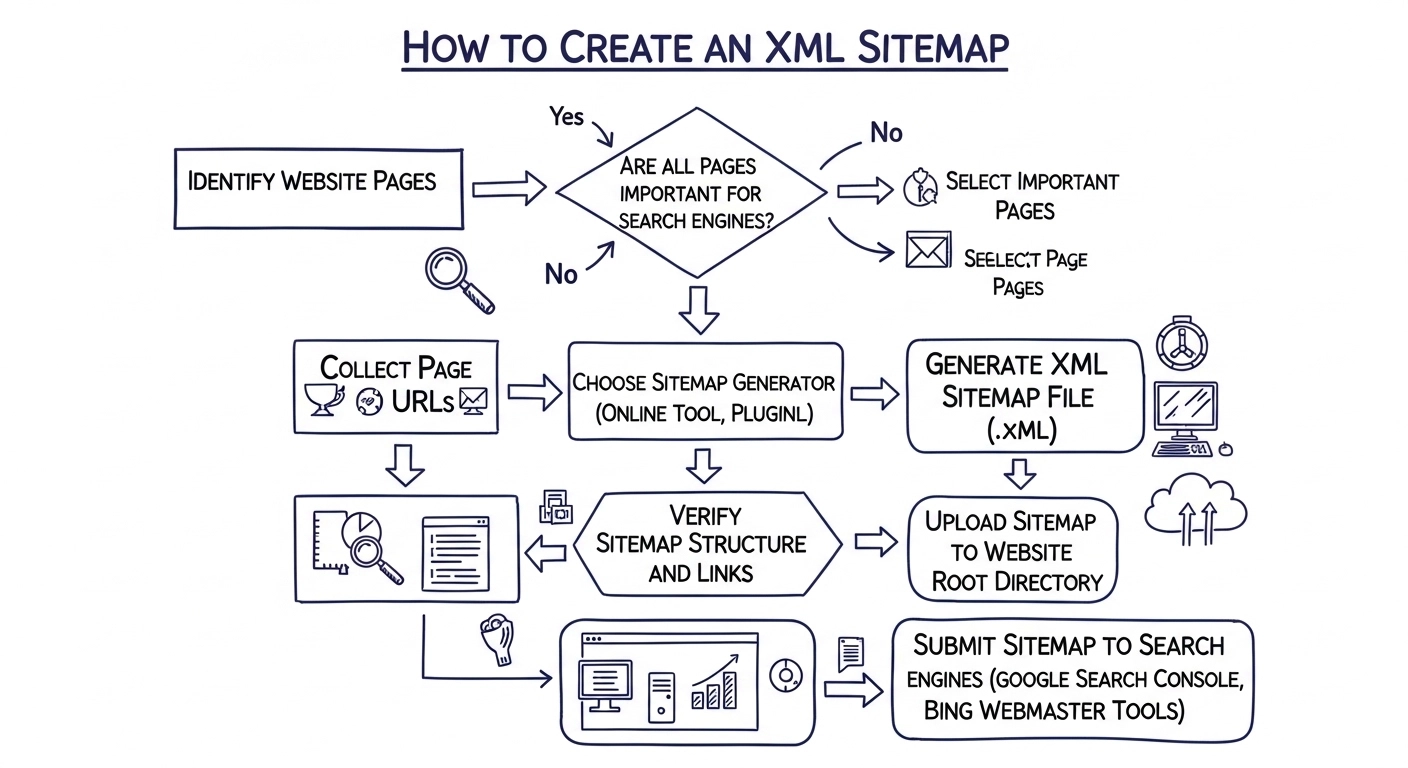
Step-by-Step: How to Create an XML Sitemap
1. Decide How You Want to Create It
There are three common methods:
Option A: Use a Plugin (Best for Beginners)
If you use WordPress, plugins make this super easy.
Popular options:
- Yoast SEO
- Rank Math
- All in One SEO
Once installed, they automatically generate your sitemap.
2. Create Sitemap Automatically (WordPress Example)
If you’re using an SEO plugin:
- Install and activate the plugin
- Go to plugin settings
- Enable “XML Sitemap”
- Copy your sitemap URL (usually like:
yourwebsite.com/sitemap_index.xml)
That’s it—no coding needed.
3. Create Sitemap Manually (Advanced)
If you’re not using a CMS, you can create one manually.
Basic structure example:
<?xml version="1.0" encoding="UTF-8"?>
<urlset xmlns="http://www.sitemaps.org/schemas/sitemap/0.9">
  <url>
    <loc>https://example.com/</loc>
    <lastmod>2026-04-01</lastmod>
    <priority>1.0</priority>
  </url>
</urlset>
Save this file as sitemap.xml and upload it to your website’s root folder.
4. Use Online Sitemap Generators
If you don’t want plugins or coding, try online tools.
Examples:
- XML-sitemaps.com
- Screaming Frog (desktop tool)
Just enter your website URL, and the tool will generate your sitemap file.
5. Submit Your Sitemap to Google
Creating a sitemap is not enough—you need to submit it.
Steps:
- Open Google Search Console
- Select your website
- Go to “Sitemaps”
- Enter your sitemap URL
- Click “Submit”
Now Google will start crawling your pages more efficiently.
Best Practices for XML Sitemaps
To get the most out of your sitemap, follow these tips:
- Include only important pages (no duplicates or low-quality pages)
- Keep it updated automatically
- Use canonical URLs only
- Limit to 50,000 URLs per sitemap
- Compress large sitemaps (use
.gzformat)
Common Mistakes to Avoid
Many beginners make these errors:
- Adding broken or redirected URLs
- Including “noindex” pages
- Forgetting to update the sitemap
- Not submitting it to Google
- Stuffing it with unnecessary pages
Avoid these, and your sitemap will actually help your SEO.
Simple FAQ
What is the ideal sitemap size?
Up to 50,000 URLs or 50MB. If your site is bigger, use multiple sitemaps.
Do small websites need a sitemap?
Yes, especially if your site is new or has few backlinks.
How often should I update my sitemap?
Automatically, whenever you publish or update content.
Is HTML sitemap the same as XML sitemap?
No. XML is for search engines, HTML is for users.
Final Thoughts
Creating an XML sitemap is one of the easiest SEO wins you can get. It helps search engines find your content faster, improves indexing, and supports your overall SEO strategy.
If you’re using WordPress, just install a plugin and you’re done in minutes. For other platforms, online tools or manual methods work just as well.